Current Marvin Pro Apex Teleop
This page applies to the current Marvin Pro with a Tianzhun controller and uses frontend 1.0.7.6o in its screenshots. The current matching baseline uses robot controller / MarvinSDK 100343001 and Teleop service 1.0.18. Use software from the same delivery release on site.
Interface overview
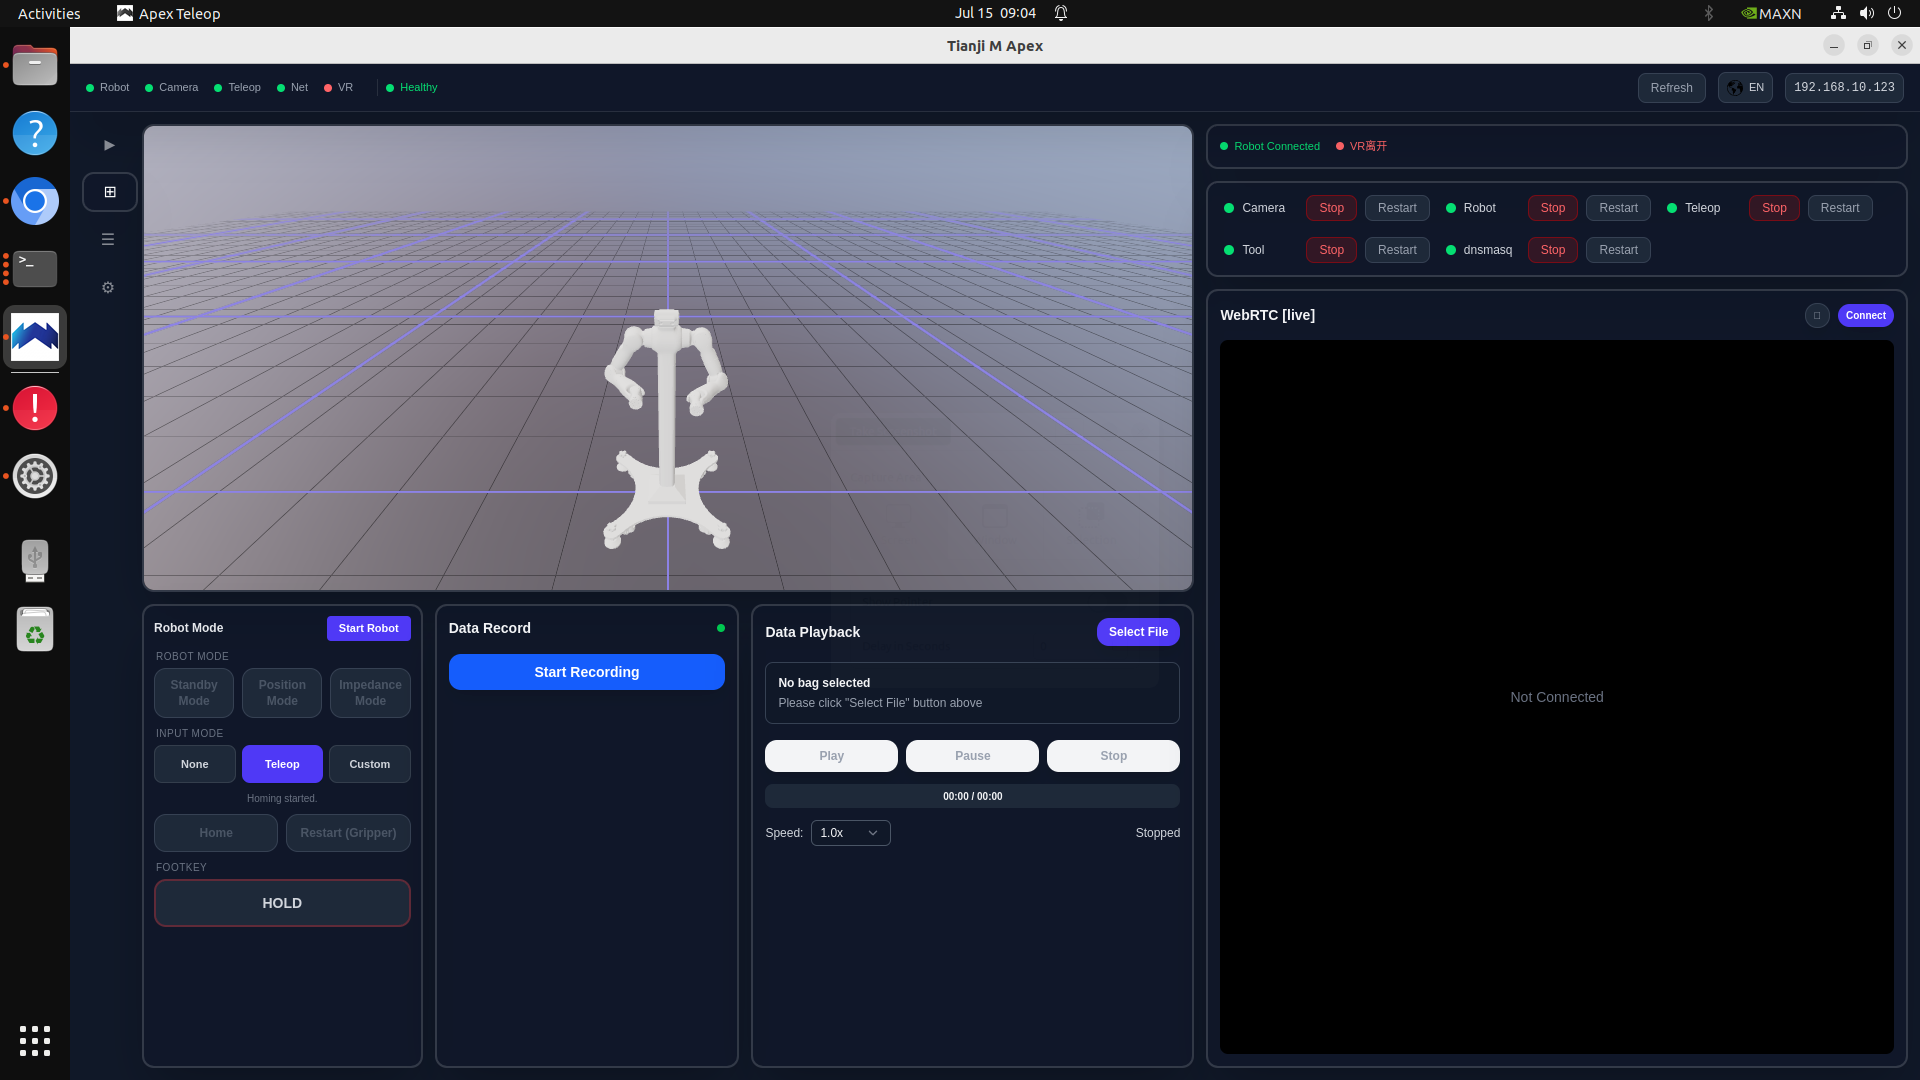
| Area | Purpose |
|---|---|
| Top status bar | Robot, Camera, Teleop, Net, VR, and Healthy states |
| Controller IP | Enter the Tianzhun controller IP and press Enter |
| 3D view | URDF model and live robot pose |
| Module controls | Camera, Robot, Teleop, Tool, and dnsmasq controls |
| Robot Mode | Set Ready, robot mode, input mode, Home, and gripper restart |
| Data Record | Robot and camera data recording |
| Data Playback | Recorded data selection and playback |
| WebRTC | Four-tile camera stream |
| Side navigation | Main, log, and settings pages |
First teleoperation sequence
- Enter the Tianzhun controller IP in the upper-right field and press Enter.
- Start Robot.
- Confirm that the URDF pose matches the physical robot.
- Start Teleop and dnsmasq.
- Start Camera when video is required. Start Tool only when an end effector is configured.
- Click Start Robot to set the robot Ready.
If both arms hang vertically close to the center column, the robot is still in its factory packing pose. Calling Home directly can cause a wrist camera to collide with the column. First move all 14 arm joints to zero using the procedure below.
Move from the Packing Pose to All Zeros
Confirm that Robot and Teleop are running and the robot is Ready. Start RQt from a desktop terminal with the Apex ROS environment loaded:
source /etc/apex/apex_ros_env.sh
rqt
Open Plugins → Services → Service Caller, then:
- Call
/control/set_modewithdata = 1to select Position Mode. - Call
/control/set_inputwithdata = 2to select Planner input. - Call
/control/movejwithjoint_valuesset to 14 zeros.
[0.0, 0.0, 0.0, 0.0, 0.0, 0.0, 0.0,
 0.0, 0.0, 0.0, 0.0, 0.0, 0.0, 0.0]
After both arms reach the all-zero pose:
- Select Impedance Mode.
- Click Home to move to the teleoperation initial pose.
- Set Input Mode to Teleop.
- Connect the headset, open the Apex headset client, and begin teleoperation.
If the robot has already left the packing pose and its path is known to be safe, proceed directly with the teleoperation-mode steps above. Watch the physical robot and wrist cameras throughout the motion and keep the emergency stop within reach.
Module controls
| Module | Required | Description |
|---|---|---|
| Robot | Yes | Connects the robot and publishes robot state |
| Teleop | Yes | Starts the teleoperation chain |
| dnsmasq | Yes | Provides network service for a wired headset |
| Camera | Optional | Starts four-camera streaming and WebRTC |
| Tool | Optional | Controls a configured gripper or end effector |
Green indicates that a module is running. Dependent controls may remain unavailable until Robot is running and the robot is Ready.
Robot Mode
Robot control modes
| Control | Description |
|---|---|
| Start Robot | Sets the robot Ready |
| Standby Mode | Does not execute external motion commands |
| Position Mode | Position control mode |
| Impedance Mode | Compliant mode used for teleoperation |
| Home | Moves to the configured teleoperation initial pose; from the factory packing pose, first MoveJ to all zeros and never click Home directly |
| Restart (Gripper) | Restarts a configured gripper |
Input modes
| Mode | Description |
|---|---|
| None | No external motion input |
| Teleop | Headset teleoperation input |
| Custom | Customer application or VLA input |
Read Customer integration interfaces before using Custom mode.
Camera view
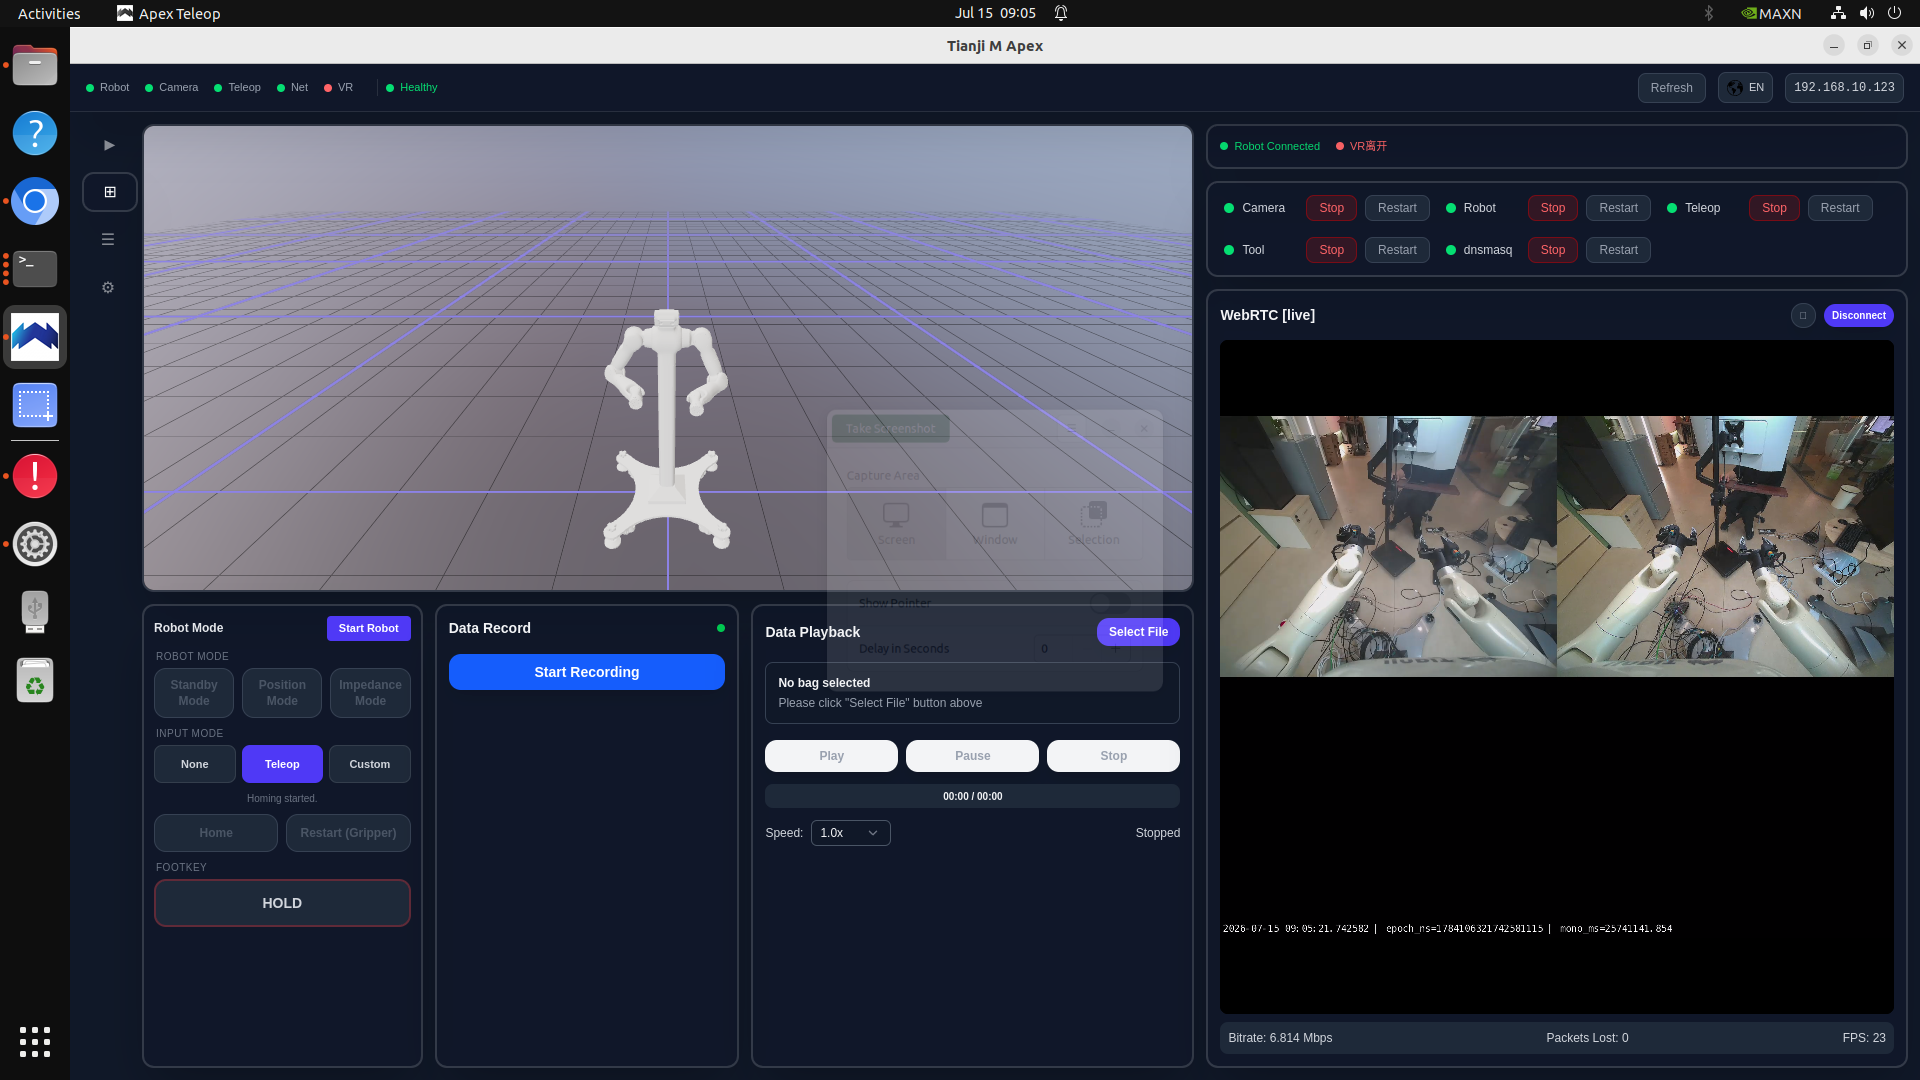
The camera panel always uses a four-tile layout. In the example, camera_sources: [0, 1, none, none] enables two cameras, so the lower two tiles are black by design. This does not indicate a camera fault. Bitrate, packet loss, and FPS are shown at the bottom.
Recording
- Connect the USB drive, set its volume label to
BAG_STORAGE, and confirm that it is mounted at/media/<user>/BAG_STORAGE. - Click Start Recording.
- Keep Robot, Teleop, and any required Camera module running.
- Stop recording and wait for writing to finish before removing the drive.
Recordings are stored by default in:
/media/<user>/BAG_STORAGE/recorded_bags
Each my_bag-* task directory should contain at least data/*.mcap, data/metadata.yaml, and video/cameras.mp4. If files are missing or MCAP cannot be read, first check for an interrupted recording and verify that the USB drive is writable.
Playback
- Click Select File and choose a recording.
- Use Play, Pause, and Stop.
- Select the playback rate from Speed.
Before physical playback, clear the workspace, verify the initial pose, and keep the emergency stop within reach.
Logs
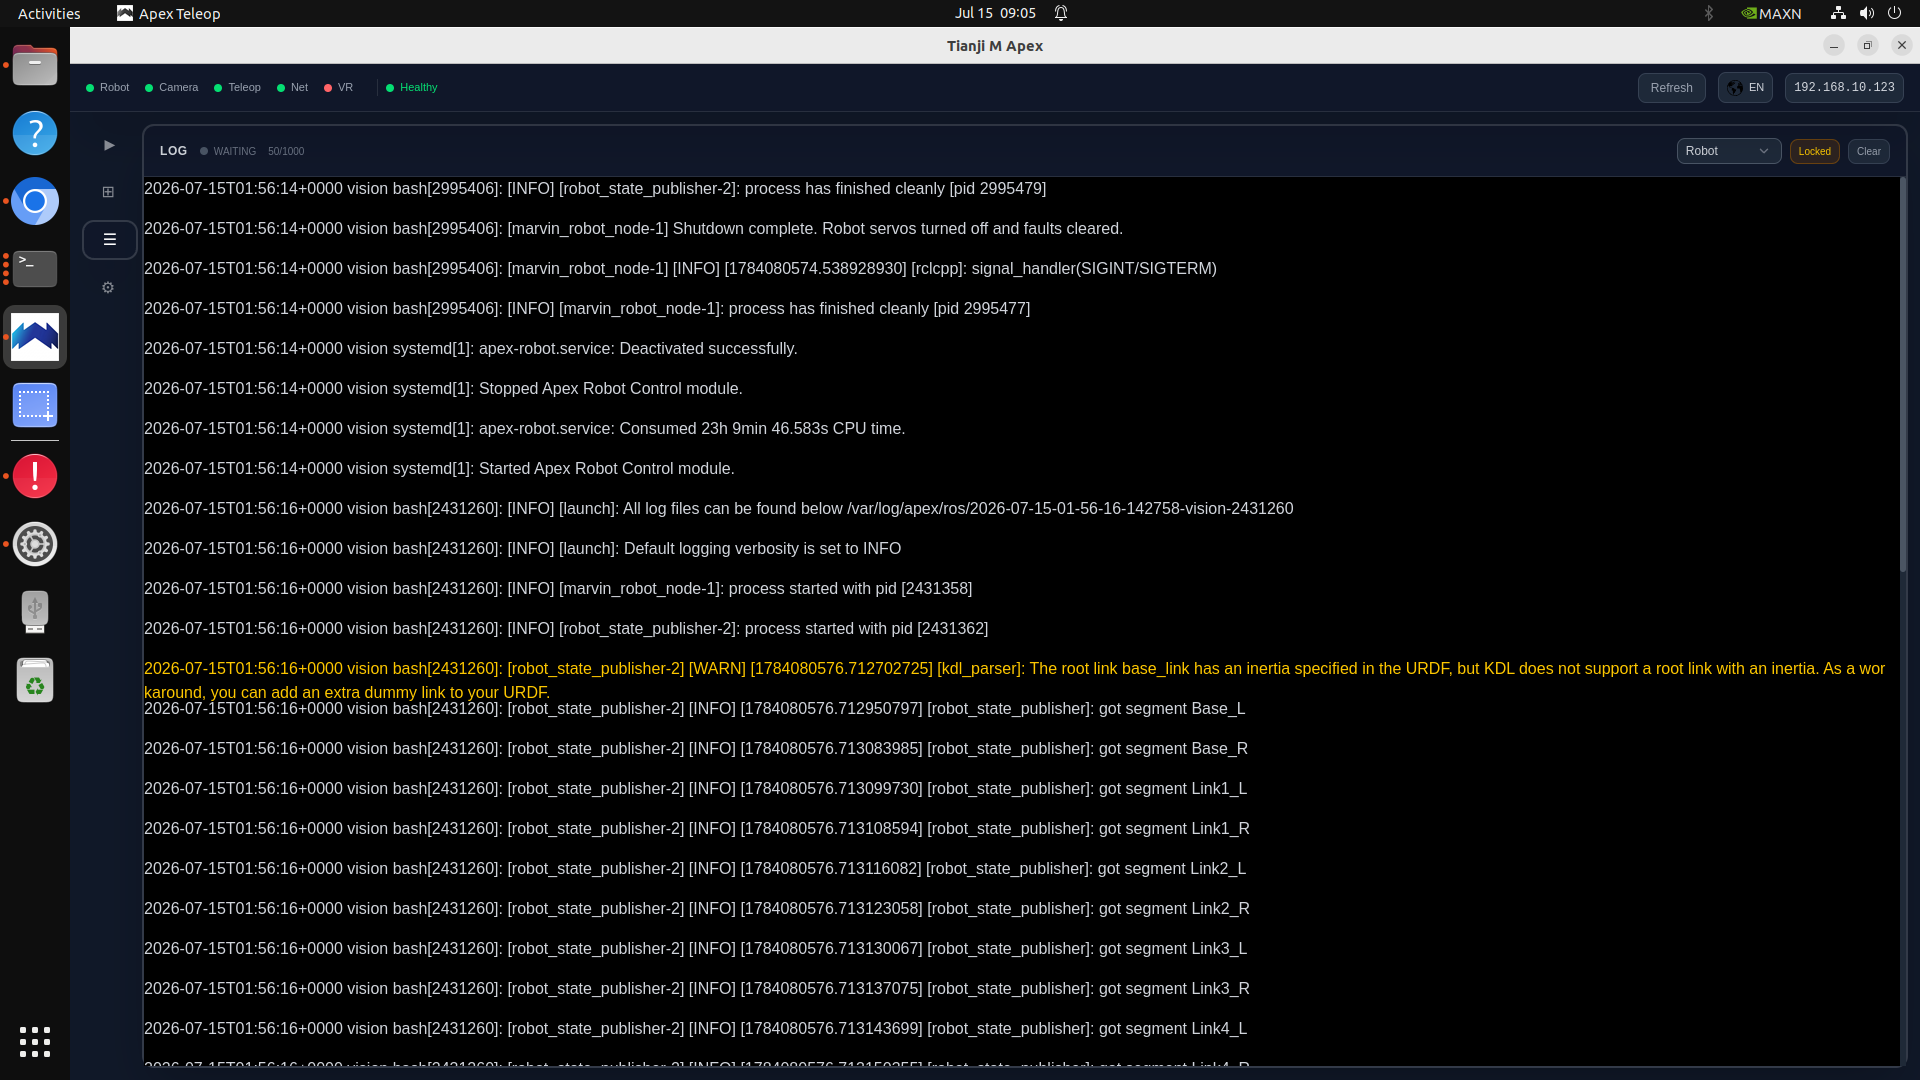
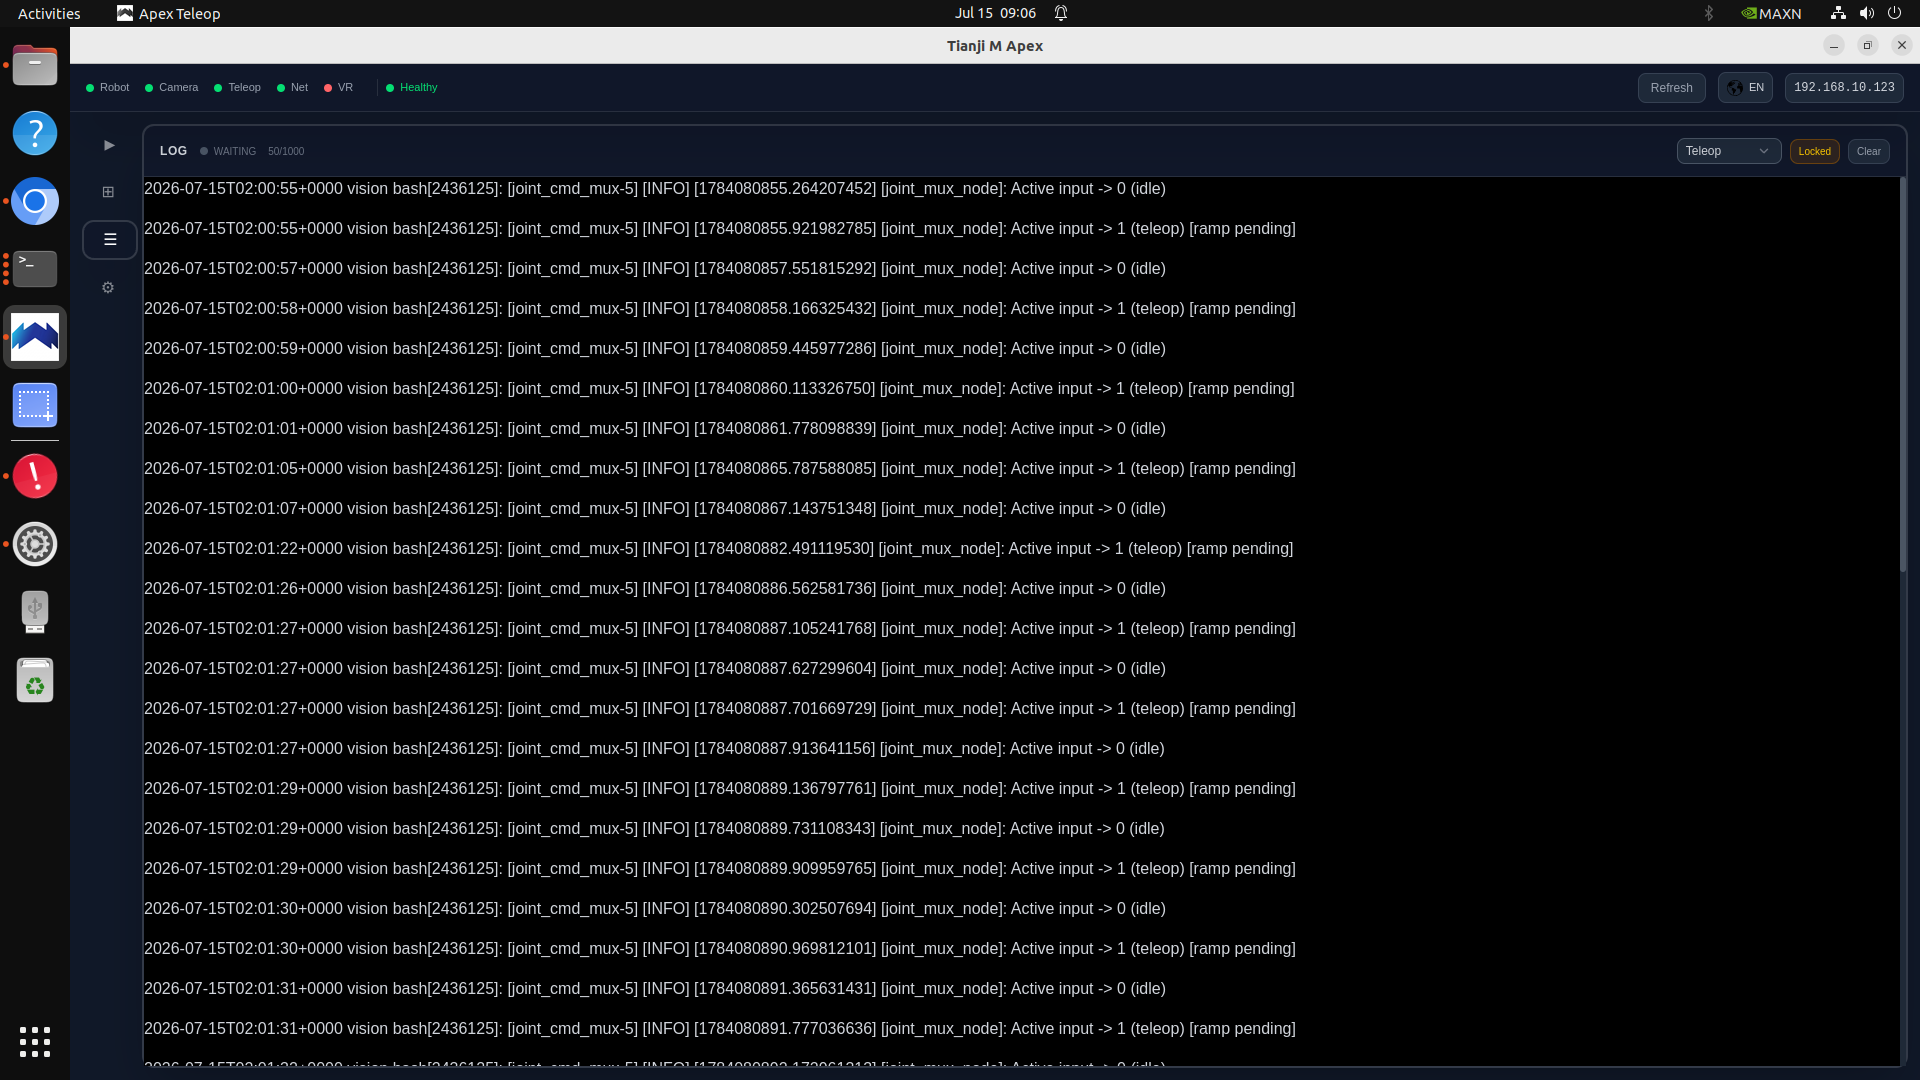
Open the log page from the left navigation and select a module from the upper-right list.
| Control | Description |
|---|---|
| Module list | Switches between Robot, Teleop, and other module logs |
| Locked | Holds the current scroll position |
| Clear | Clears the currently displayed log |
Record the fault time and inspect both Robot and Teleop logs. Do not diagnose a fault from status indicators alone.