Classic Apex Teleop Interface
This page applies to historical Orin-based Marvin Pro systems and current Skye/Luna systems. The current Gento documentation baseline is frontend 1.0.6.81g. Button labels may vary slightly between delivery releases.
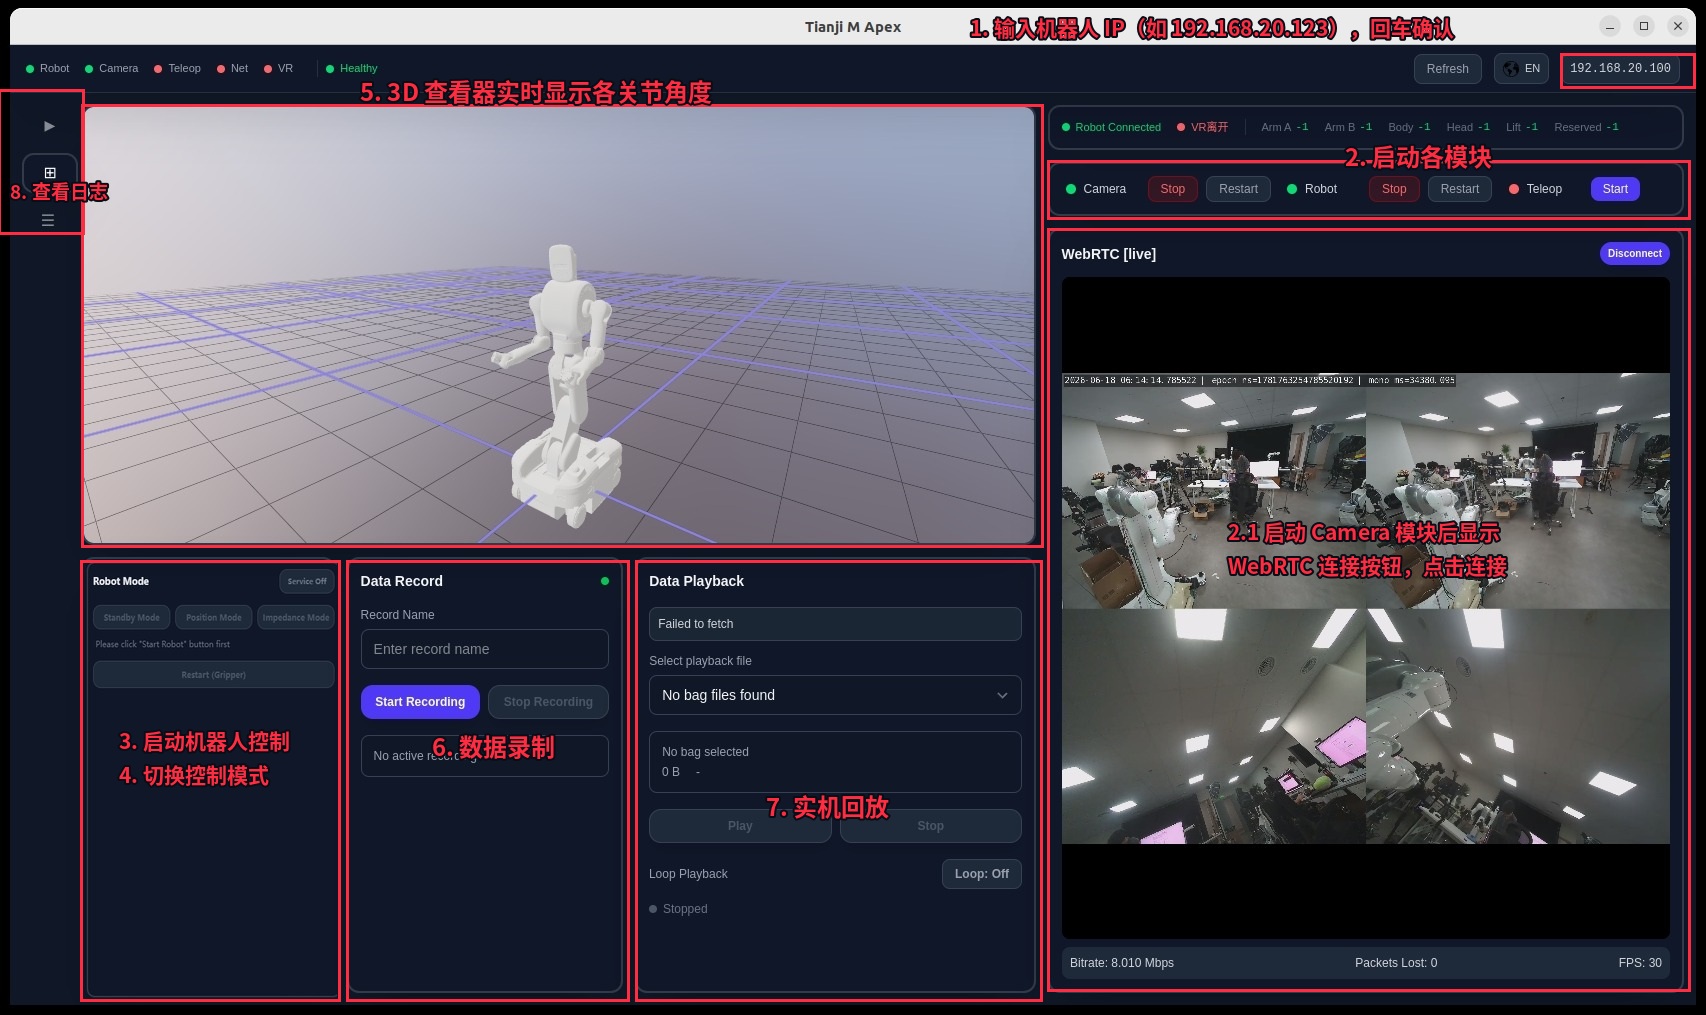
Connect and start
- Enter the controller IP in the upper-right field and press Enter.
- Start Robot and verify that the 3D model matches the physical robot.
- Start Teleop and the network module required by the product quick start. Camera is optional.
- Click Start Robot or the corresponding robot start control.
- Select Impedance Mode, then execute Home.
- Connect the headset and start teleoperation.
Skye/Luna uses Pico with full-body trackers. Historical Marvin Pro systems use Pico or Meta Quest according to the delivered configuration.
Main areas
| Area | Description |
|---|---|
| Status bar | Robot, Camera, Teleop, Net, VR, and Healthy status |
| 3D Viewer | Live robot joint pose |
| Module Control | Start, stop, or restart Camera, Robot, and Teleop |
| Robot Mode | Start the robot, select Standby/Position/Impedance, and Home |
| Data Record | Name, start, and stop a recording |
| Data Playback | Select and play recorded data |
| WebRTC | Connect to and display camera video |
| Log | Select a module and inspect runtime logs |
Recording and playback
Before recording, confirm that the USB drive labeled BAG_STORAGE is mounted and check Camera state. Enter a recording name, click Start Recording, then click Stop Recording when finished. Data is stored by default in /media/<user>/BAG_STORAGE/recorded_bags. For playback, select a recording and use Play, Stop, and the loop option.
Physical playback can move the robot. Verify the initial pose, workspace, and emergency stop first.
Logs
Open the log page from the side navigation and select Robot, Teleop, Camera, or the network service. Record the fault time and retain the relevant log output when a module fails, VR cannot connect, or video is unavailable.